

How To Create Dynamic Website Using Javascript
Build a Dynamic App Using JavaScript, HTML and CSS
![]()
Let's Build a natural hair Single Page App using Vanilla JavaScript (ES6)!
Knowledge Needed to Follow This Tutorial Series
- A basic understanding of JS syntax: declaring variables, accessing values on an object, iterating over an array, writing a function, etc.
- ES6 is good to have but not necessary
- Desire to build something!
Tutorial Series Overview
When I was learning JS I came across a lot of exercises and algorithms like "FuzzBuzz", a nd creating JS functions that did things like take two or more arrays to return a new array of unique values in the order of the original provided arrays. In short I learned about about JS syntax but nothing that shed light on how to apply what I was learning to building an actual web app. This tutorial will do just that. Show how JS is used in web development, there be some theory, concept explanation and of course it's a practical exercise. So please follow along!
This tutorial will be a 4 part series to build a working app with CRUD. CRUD is a feature that real apps have, it's that your app be should be able to handle: Create, Read, Update and Delete operations.
- Reading: Dynamically displaying data (you are here)
- Creating: Allow User Input
- Updating/Editing
- Deleting
What You'll Build
You'll build a natural hairstyle website where users can browse different styles (reading), add new styles (creating), edit styles (updating) and delete styles. Users will able to filter which styles they see by difficulty.
Let's Start the Tutorial!
What Is Reading?
A big part of front end web development can be boiled down to "displaying information". Information in this context is d-a-t-a. Let's take a real world example: Twitter. Twitter has a database that stores all tweets that have ever been tweeted. When you go into your feed you are seeing how Twitter is choosing to display the tweet data that's stored for all the tweets you have in your feed.
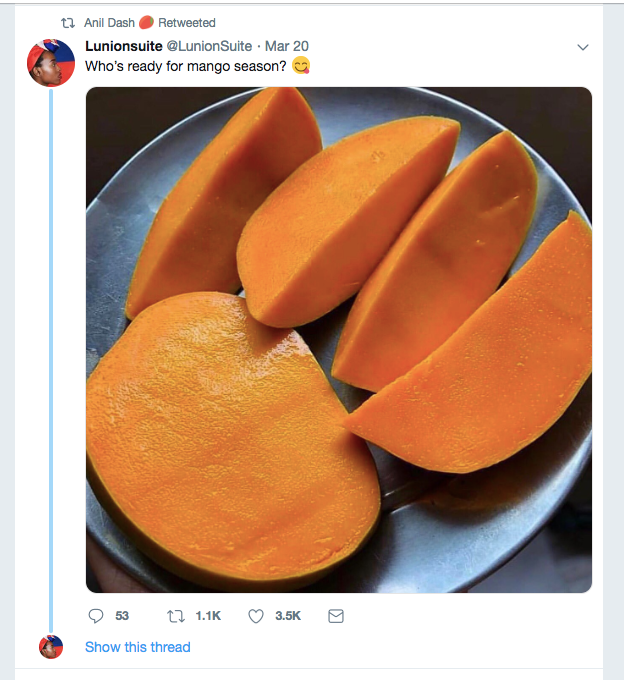
Reading is about the transformation of data from a data source that might look something like this:
          {
            "author": "Lunionsuite",
            "author_handle": "LunionSuite",
            "created": "March 20th, 2019,
            "text": "Who's ready for mango season? :tounge-out:",
            "picture": "http://linktohostedimage.com",
            "likes": 3,507,
            "retweets": 1,123,
            "comments": 53
}
Into an actual User Interface (UI) that displays that same information but in a way that makes sense for a human to consume:
Steps of Development
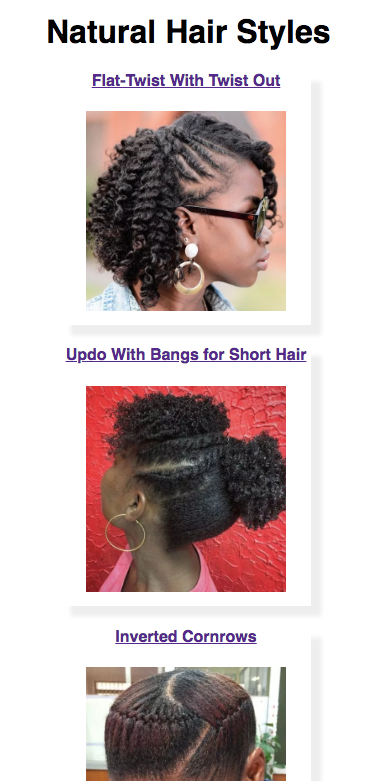
By the end of this first tutorial in the series, your site will look like this:
Let's talk through the steps needed to get here:
- Project setup
- Create a single card using HTML with hardcoded values
- Create a single card dynamically Using JS
- Statically Add Information to HTML Elements with JavaScript
- Dynamically Add Information to HTML Elements with JavaScript
- Dynamically build entire list of 10 — — in the data
1) Project Setup
- For this tutorial series I recommend writing code with codesandbox.io, (no signup required). You can also any code editor like Visual Studio Code, Sublime, etc.
- Regardless of which coding program you choose, make sure you start off with 3 files:
index.html,index.jsandstyles.css. The last two files should be inside of a folder namedsrc. And each file should look as follows:
          // index.html          <!DOCTYPE html>          <html>                      <head>                      <title>Natural HairStyle Site</title>                      <meta charset="UTF-8" />                      <link rel="stylesheet" type="text/css" href="./src/styles.css" />                      </head>                      <body>                      <script src="src/index.js"></script>                      </body>          </html>          // index.js (completely empty)          // styles.css          body {
            font-family: sans-serif;
            width: 50%;
            margin: auto;
}
- The end of each step will have a link to the project showing the final code for that step.
Step 1's code is: here
2) Create a Single Card Using HTML with Hardcoded Values
In this step you'll break down the user interface (UI) into HTML in order to recreate it dynamically in JavaScript in the next step.
First consider what the final UI should look like for a single "card" and the HTML elements needed to build it:
Note: thanks to the popularity of JS frameworks like React, Angular, etc. this approach of reviewing the final UI in order to identify the building blocks needed to build it is now a standard part of front-end development!
Determine the barebones HTML:
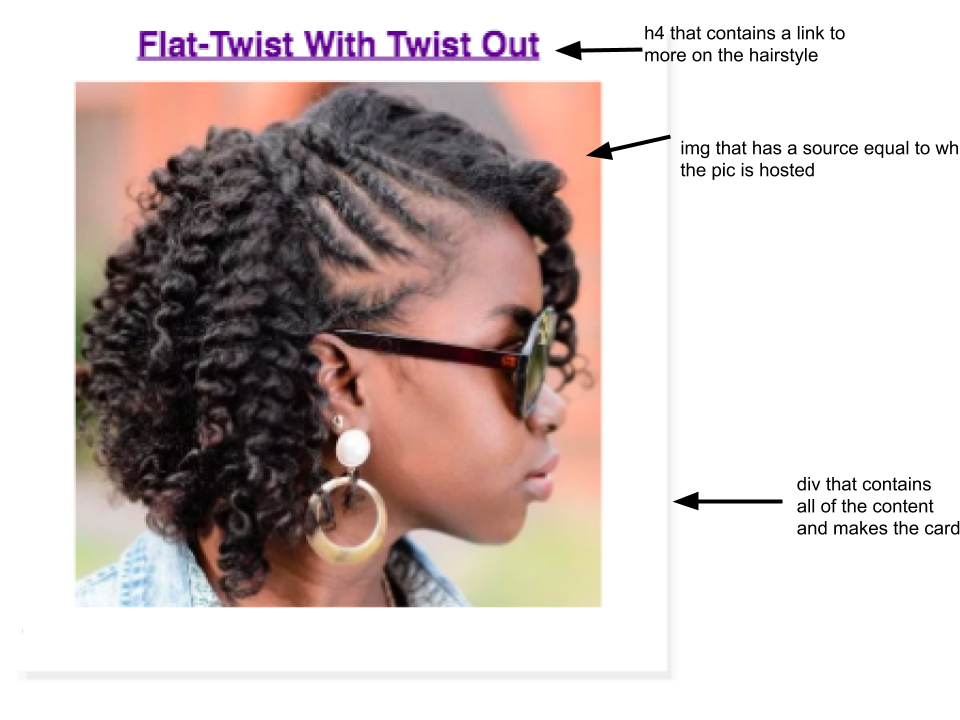
After reviewing the UL, what are the building blocks or HTML needed to build this? What structure or order should the blocks be arranged in?
          // index.html (inside of the <body>)                      <div>                                              <h4>
              <a></a>
              </h4>                                              <img />                                </div>
If you spin this up, you'll see that this is far from what the final UI should look like. And that's okay! This is expected since you haven't specified what each HTML element should contain. Going back to your final UI you know that you want:
- The
ain theh4to 1) point to the hairstyle's url and 2) display that name of the hairstyle - The
imgshould receive the url of the hairstyle's picture
Let's take a quick look at the data you'll be using to flesh out the first card.
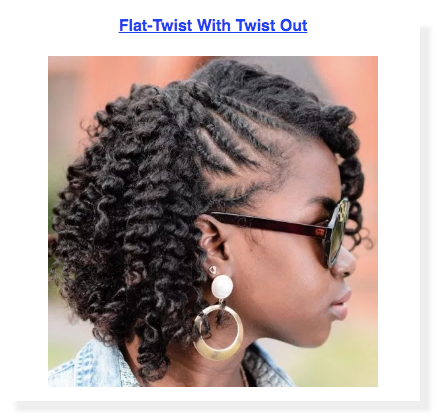
Data for the first hairstyle:
          {
id: 1,          pic: "https://i0.wp.com/therighthairstyles.com/wp-content/uploads/2014/03/13-flat-twist-with-twist-out-2.jpg?w=500&ssl=1",          name: "Flat-Twist With Twist Out",          difficulty: "Medium",          info: "https://therighthairstyles.com/20-most-inspiring-natural-hairstyles-for-short-hair/"          }
How do the values in this object map to the HTML needed to build out a card?
Putting the HTML all together
                      // HTML for a single card                                <div>                                              <h4>
            <a href="https://therighthairstyles.com/20-most-inspiring-  natural-hairstyles-for-short-hair/">
            Flat-Twist With Twist Out
            </a>
              </h4>                    <img src="https://i0.wp.com/therighthairstyles.com/wp-content/uploads/2014/03/13-flat-twist-with-twist-out-2.jpg?w=500&ssl=1"/>                      </div>
Here you can see that the href for a is should be copied from the info key in the data. And the src for the img should be copied from the pic value from the data.
Your UI should now look like this:

This is much better than before! BUT still it looks a bit funny because the image is so large especially with respect to the heading. You can create and add styles to your css.
          img {
            width: 80%;
            height: 100%;
}          .card {
            box-shadow: 10px 10px 5px 0px rgba(238, 238, 238, 1);
            margin: 15px;
            text-align: center;
            padding-bottom: 10px;
}
Updated HTML (added 'card' class to the div)
                      // HTML for a single card                                <div class="card">                                <h4>
            <a href="https://therighthairstyles.com/20-most-inspiring-  natural-hairstyles-for-short-hair/">
            Flat-Twist With Twist Out
            </a>
              </h4>                    <img src="https://i0.wp.com/therighthairstyles.com/wp-content/uploads/2014/03/13-flat-twist-with-twist-out-2.jpg?w=500&ssl=1">                      </div>
A single hairstyle card now looks like this:
Final code for Step 2 can be found: here
You're now ready to build this card dynamically in JavaScript!
3) Create a Single Card Dynamically Using JS
Before diving in to re-build this card dynamically, let's take time to discuss what "dynamically" actually means. Remember that front-end development is all about displaying information. In the last step you created the card in HTML with the following information:
- Hairstyle name,
- Url to link to webpage with more information on the hairstyle and
- The source to the image
were all inputed directly into the HTML.
When you explicitly pass information by copying and pasting, this is called hardcoding and is something to be avoided when building out actual apps like you will do in this tutorial series.
When working with a real app your data is dynamic, meaning it can change. You want frontend to be able to update (display the data that's changed) without having to manually go in and copy + paste the new values.
This tutorial will break adding dynamic info into 2 steps. This current will focus on dynamically building the HTML for a card in JavaScript. And the next step will focus on how to dynamically add values from the data source into the dynamically built card.
So first, let's go over how to build an HTML element in JavaScript. But first remember to comment out the card HTML that was added to index.html in the previous step.
Create HTML Elements With JavaScript
One of the many reasons JavaScript is so popular is because you can use it to make dynamic HTML. This is sometimes referred to as manipulating the DOM. The DOM = Document Object Model. What's important to know now is that it's a representation of the HTML that JS has access to and can add/remove/edit HTML.
Let's look at the syntax for creating an HTML element in JS:
document.createElement('elementName') A few things to note here:
-
documentis a native JS object, it represents the HTML the JS is making changes to. Native means that you don't have to declare it (var document) in order to use it. -
.createElement('elementName')is a function thatdocumenthas. It's responsible for creating a new elements. It takes 1 parameter and that the name of the element that should be created (the quotes are necessary). -
elementNameit's the name of the HTML element you want to create.'div'to create adiv,'p'forp, and so forth
Going back to the complete HTML from the previous step, in order to create a card the following HTML elements are needed: div , h4 , a and img. How would you create them in JS?
They can be created like so:
          // index.js
const div = document.createElement('div')
const h4 = document.createElement('h4')
const a = document.createElement('a')
const img = document.createElement('img')
The constants were created to hold a reference to the newly created elements. This is important because later in this step these elements will be manipulated (adding class names, attributes, etc) and by adding a constant for each element, that allows a way to target each element as you'll see below. Also quick note, the constant names don't have to make the newly created element names. They could be anything. However since they're going to be used to reference the elements that were created it makes sense to name them accordingly to ensure clarity. You can also use var or let instead of const.
If you check the site now with this JS in place the UI is still completely blank. This is because creating HTML elements in the JS isn't enough. You must explicitly add the newly created elements to the DOM. As it is now it's like having added them to your shopping cart but you haven't checked out yet.
Adding Elements to the DOM
To add elements to the DOM there's a method called append. It works like this:
parentElement.append(element) To break this down: append takes an element and adds it as the last child inside of another element (parentElement).
Consider the case of the previously created div that will become the container for the card. To add this element to the DOM what would the parentElement be?
It comes down to where do you want to add the card in the HTML? To get a better sense of this, let's look at the HTML file in its entirety:
          <!DOCTYPE html>          <html>
            <head>
            <title>Natural Hairstyles</title>
            </head>                      <body>
            <h3>Natural Hairstyles Website</h3>                      <!-- HTML for card here -->                      </body>          <html>
The body is where the card should be added to. Let's break down the JS needed in order to make it happen.
          // Remember the syntax for appending elements
// parentElement.append(element)          // You want to add the div to the body
// while div is a constant you previously created
// body is not. It must be createdconst body = document.querySelector('body');                    // querySelector takes a selector and returns the element that matches the selector from the DOM. The selectors are just like CSS selectors: .class, #id, element, etc          // Now you can do:          body.append(div)
The HTML has been updated as follows:
          // Resulting HTML
<!DOCTYPE html>          <html>
            <head>
            <title>Natural Hairstyles</title>
            </head>          <body>
            <h3>Natural Hairstyles Website</h3>                      <div></div>          </body>          <html>
Nice the div is now there! How would you go about adding the remaining HTML elements to the DOM?
          // Add the anchor tag inside of the h4
h4.append(a)          // Add the h4 inside the div
div.append(h4)          // Add the img inside the div
div.append(img)
Resulting HTML
<body><h3>Natural Hairstyles Website</h3>
<div>
<h4>
<a></a>
</h4>
<img />
</div> </body>
Quick note: when it comes to appending elements to other elements, order matters. Test this out by doing div.append(img) before div.append(h4). What changes?
You have now dynamically built the HTML needed for a card in the JS.
Final code for this step is: here
Now let's work on filling in HTML content with JavaScript.
4) Statically Add Information to HTML Elements with JavaScript
I hope you tried out the above! Now let's tackle the next issue. While the HTML structure of the card is now correctly built by JS, there are elements missing:
- Their content,
ashould display the name of the hairstyle - Their attributes,
ahas anhrefattribute that should be set to a url for more info the hairstyle,imghas asrcattribute that should point to a url for the hairstyle photo anddivhas aclassattribute to applycardstyles to it.
Setting Element Content with innerHTML
innerHTML allows you to set or override the contents of the element that it's called on.
a.innerHTML = "Flat-Twist With Twist Out" Resulting HTML
          <body>          <h3>Natural Hairstyles Website</h3>                      <div>
            <h4>
            <a>Flat-Twist With Twist Out</a>
            </h4>
            <img />
            </div>          </body>
Setting an Element's Attributes with setAttribute
setAttribute is a function that takes two parameters: 1) the name of the attribute to be set and 2) the value to set the attribute to
div.setAttribute('class', 'card') a.setAttribute('href', 'https://therighthairstyles.com/20-most-inspiring-natural-hairstyles-for-short-hair/') img.setAttribute('src', 'https://i0.wp.com/therighthairstyles.com/wp-content/uploads/2014/03/13-flat-twist-with-twist-out-2.jpg?w=500&ssl=1')
Resulting HTML
          <body>                      <h3>Natural Hairstyles Website</h3>                                    <div class="card">                                              <h4>
            <a href="https://therighthairstyles.com/20-most-inspiring-  natural-hairstyles-for-short-hair/">
            Flat-Twist With Twist Out
            </a>
              </h4>                                <img src="https://i0.wp.com/therighthairstyles.com/wp-content/uploads/2014/03/13-flat-twist-with-twist-out-2.jpg?w=500&ssl=1"/>                                    </div>                    </body>
Yesss, the HTML now has the right structure, content and attributes!
Final code for this step: here
5) Dynamically Add Information to HTML Elements with JavaScript
Coming out of the last step, the UI looks right but notice that the href attribute on a and src on img were set via hardcoding as was the hairstyle name. What would happen if the url for getting more info on this hairstyle was updated in your database? How about if the hairstyle name or image url were changed? You would have to grab the new value from the database and copy and paste it over into your JS. Remember that the data.js file is acting as your database. In real apps your frontend should be able to talk to your database. If a value changes in the data, your frontend should be able to update itself without you having explicitly copy and paste the change. Let's dive into how to make this "talking" between the data and the frontend happen!
A Quick Look at data.js
In fullstack apps data usually is stored in a database and/or pulled from external API's. Since this tutorial is focused on the front-end you'll just be using a JS file as the data store. In real apps data retrieved from the database will look a like what you'll work with in this tutorial.
To get started create a data.js file inside of the src folder and fill it with the contents below:
When this file is changed you want values being in the JS to be changed to keep the HTML in sync. First, your JS must know about this data.
Importing Data into the JS
// in index.js import data from './data.js'
A few things on the syntax happening above:
- Imports must always be placed at the top of a JavaScript file before any other code is written
-
import something from 'somewhere'is basic syntax for bringing in the contents of a file into another file, added in ES6 - As you'll see later
datacan be treated as a variable and is equal to the array found indata.jsthat contains 10 objects representing different hairstyles
Using the Imported Data to Dynamically Set Attributes and Content
Data is an array of 10 objects, right now you're still focusing on displaying a single card. This card is pulling information from the very first object in the array. How would you create a constant that represents the first item or hairstyle in the array?
const hairstyle = data[0] Remember that 1) brackets [index number]are used to pull an item from an array at a particular index and 2) that array index's begin at zero
How would you use this hairstyle constant to update your previous JS for setting the content of a to be the hairstyle name?
a.innerHTML = hairstyle.name Remember that . dots are used with objects. .name is looking up the name property on the hairstyle object (first item in data array) and returning the value that property. This is more dynamic than a.innerHTML = "Flat-Twist With Twist Out" because if the name property changes in data.js hairstyle.name will automatically update to reflect the change. I encourage you to try this out by changing the name of this first item in the data.js array and seeing what happens.
Moving forward, how would you further use hairstyle to update your previous JS for setting the href attribute on a and the src attribute on img?
a.setAttribute('href', hairstyle.info) img.setAttribute('src', hairstyle.pic)
The resulting HTML:
          <body>                      <h3>Natural Hairstyles Website</h3>                                    <div class="card">                                              <h4>
            <a href="https://therighthairstyles.com/20-most-inspiring-  natural-hairstyles-for-short-hair/">
            Flat-Twist With Twist Out
            </a>
              </h4>                                <img src="https://i0.wp.com/therighthairstyles.com/wp-content/uploads/2014/03/13-flat-twist-with-twist-out-2.jpg?w=500&ssl=1"/>                                    </div>                    </body>
This HTML is the same as before BUT you are now dynamically setting the content and attributes to keep in sync with the data, nice!
Final step code: here
6) Dynamically Build Entire List of 10 Hairstyles
The data.js file has 10 hairstyle objects but currently you're only displaying a single card. Let's change this so that there's a card for each hairstyle!
Create HTML For Each Hairstyle in Data Using ForEach
Arrays have many methods that can be used on them, such as push for adding a new item to an array, map for iterating over every item in an array and returning a new array. And there's also forEach, which is a function that iterates over every item in an array and calls a function on every item. Let's look at a quick example.
const friends = ['Shaggy', 'Fred', 'Daphne', 'Velma'] const sayHi = (friend) => console.log('Hi ' + friend) friends.forEach(friend => sayHi(friend))
The result can be found in the console (macs: cmd + option + j, windows: Ctrl + Shift + J)
          'Hi Shaggy'
'Hi Fred'
'Hi Daphne'
'Hi Velma'
forEach runs a function on every item in the array.
Create a function that you want to be run on every hairstyle in data.js in order to create the HTML (structure, content and attributes) so that each hairstyle has a card. Hint: you should be able to reuse a good amount of previously written code.
          const buildHairstyleCard = (hairstyle) => {                      // Create elements needed to build a card
            const div = document.createElement('div')
            const h4 = document.createElement('h4')
            const a = document.createElement('a')
            const img = document.createElement('img')                      // Append newly created elements into the DOM
            const body = document.querySelector('body');
            body.append(div)
            h4.append(a)
            div.append(h4)
            div.append(img)                      // Set content and attributes
            a.innerHTML = hairstyle.name
            a.setAttribute('href', hairstyle.info)
            img.setAttribute('src', hairstyle.pic)
            div.setAttribute('class', 'card')          }
How can you use buildHairstyleCard and forEach to actually build a card for every hairstyle in the data array?
data.forEach(hairstyle => buildHairstyleCard(hairstyle)) The code above is using an arrow function => which was made available in ES6. Arrow functions are nice because they save space and have the ability to remember their context. This same forEach function can be written in ES5 as follows:
          const buildHairstyleCard = function(hairstyle){          // Create elements needed to build a card
            const div = document.createElement('div')
            const h4 = document.createElement('h4')
            const a = document.createElement('a')
            const img = document.createElement('img')          // Append newly created elements into the DOM
            const body = document.querySelector('body');
            body.append(div)
            h4.append(a)
            div.append(h4)
            div.append(img)          // Set content and attributes
            a.innerHTML = hairstyle.name
            a.setAttribute('href', hairstyle.info)
            img.setAttribute('src', hairstyle.pic)
            div.setAttribute('class', 'card')          }
And for the forEach:
          data.forEach(function(hairstyle) {
            buildHairstyleCard(hairstyle)
}
The code is equivalent so take your pick!
Final code for this step and tutorial: here
Conclusion
I hope this was helpful! And the following tutorials in the series are coming soon, I'll update this post as they're created.
Happy coding!
How To Create Dynamic Website Using Javascript
Source: https://medium.com/@pearlmcphee/build-a-dynamic-app-using-javascript-html-and-css-f0dfc136007a
Posted by: fletchersetime.blogspot.com
0 Response to "How To Create Dynamic Website Using Javascript"
Post a Comment